Address
Caochang Industrial Area, Liguang Rd, Lishui, Nanhai, Foshan, Guangdong, China
Phone:
0086-20-8938 9313
0086-757-8938 9313
Email:
Work Hours
Monday to Friday: 8AM - 10PM
24x7 online service

Address
Caochang Industrial Area, Liguang Rd, Lishui, Nanhai, Foshan, Guangdong, China
Phone:
0086-20-8938 9313
0086-757-8938 9313
Email:
Work Hours
Monday to Friday: 8AM - 10PM
24x7 online service
Custom LED Light Box & SEG Display Manufacturer
Approve a complete light box, not just a bright photograph. The sample should use the frame, graphic, driver, connectors and mounting arrangement intended for the order. Check it at the size and viewing conditions that matter to your shop or exhibition. Keep the drawing, measurements, fitted-graphic photos and unresolved corrections together, so the production team has a clear reference.

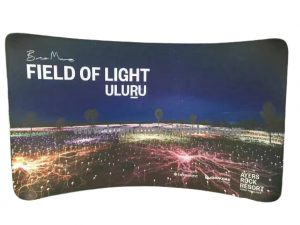
The SEG light box shown here uses a fabric-faced format. A snap-frame, magnetic, crystal or rotating model needs its own graphic-fit, opening and mounting checks. This guide covers printed illuminated light boxes, not digital video screens.
Put a sample ID on the unit and use the same ID on the approval record. Attach the drawing revision, artwork version and component list. Describe which face is illuminated, how the frame is mounted and where the power cable leaves the enclosure. A sample that differs from the quoted configuration needs a written explanation before approval.
For a store rollout, choose a representative installation, including its wall or fixture, cable position and staff access. For a large display, do not treat a small demonstration frame as proof of full-size lighting or rigidity. Ask for evidence for the production size and document any difference between the sample and the ordered units.
The approval file should contain five things: the agreed configuration; the check results; photographs with useful labels; a list of corrections or substitutions; and the buyer’s approval decision. Record the actual person and date of approval. Do not replace a failed check with an informal “looks fine” message.
Start with the drawing. Measure the outside width and height between the stated reference points; then measure the visible image opening. On a rectangular frame, compare both diagonals on a suitable flat surface to check squareness. Record the measuring tool and the agreed tolerances. A nominal size on a quotation is not a complete inspection instruction.
Next, fit the actual production graphic. The outside frame dimensions are not automatically the print dimensions. Profile overlap, channels, sewn edges and attachment methods can change the template. On an SEG system, record the finished fabric size and silicone-edge specification, and assess the graphic in the fitted state. Do not assume a raw cut-panel measurement proves that a sewn, tensioned graphic will fit.
| Measurement | Drawing requirement | Sample evidence |
|---|---|---|
| Outside frame W / H / depth | Reference points, units and tolerances | Actual values; photos showing the measuring tool and endpoints |
| Visible graphic opening | Clear image area and any border overlap | Measured opening; fitted print with important text inside the clear area |
| Finished graphic and edge | Approved template, finishing and attachment | Template revision; edge detail; fitted front and corner photos |
| Fixing and cable positions | Hole spacing, mounting orientation and cable exit | Measured rear view; fit against the intended fixture or installation drawing |
If the frame dimensions pass but the graphic wrinkles, keep those as separate results. Check the template, finishing and fitting method before changing the print size. Otherwise, a correction that hides one wrinkle can create a loose edge or move a logo into the frame border.
Use the intended graphic and the supplied power configuration. Inspect the lit face from the normal viewing position, then look at the edges and corners. Record the room lighting, viewing distance, warm-up or operating period and graphic version. Inspect the actual area that the buyer will see, not just a close-up of the brightest part.
For visual comparison photos, keep camera position, exposure and white balance consistent. Automatic camera adjustment can hide brightness or color differences. A photograph is useful for recording a visible dark band, but it is not a brightness, CCT or CRI measurement. When an order requires numerical optical values, agree the instrument, measuring positions, conditions and acceptance limits, then retain the actual results.
Compare colors under illumination, particularly pale backgrounds, skin tones and brand colors. Check that small text remains readable and test any QR code at its intended viewing position. Keep the approved lit reference with the artwork and material version; an unlit paper proof does not capture the complete installed appearance.
A qualified technician should review electrical compatibility and any tests requiring access to the enclosure. Match the driver, input/output ratings, connector and destination supply to the approved configuration. Do not open powered equipment or improvise a wiring test. Record abnormal flicker, noise, smell or damage and stop use when safety is in doubt.
For each row, record Pass, Correction Required or Hold, with a photograph, measurement or document reference. The acceptance limits must come from the agreed specification. These are inspection tasks, not claims that a particular BrandMate model has already passed a test.
| No. / check | Evidence to record | Do not approve until |
|---|---|---|
| 1. Model identity | Sample ID, product type and quoted configuration | The sample and order refer to the same configuration |
| 2. Revision control | Drawing, artwork and component-list revisions | Conflicting or outdated revisions are resolved |
| 3. Materials and finish | Frame, face/graphic, rear panel where used, and finish references | Descriptions identify the actual parts, not only “premium material” |
| 4. Outside dimensions | Measured W / H / depth against stated reference points | Values meet the drawing’s agreed tolerances |
| 5. Visible opening | Clear image area and border overlap | The approved message and graphic layout fit the visible area |
| 6. Finished graphic | Print template, edge construction and fitted photos | The finished graphic fits without the agreed unacceptable defects |
| 7. Squareness | Diagonal measurements for a rectangular frame | The frame meets the agreed geometry requirement |
| 8. Joints and connections | Corner fit, fasteners and visible gaps | Loose joints, damaged connectors and missing parts are corrected |
| 9. Mounting arrangement | Bracket, fixing position, orientation and site review | The installer confirms suitability for the actual substrate and unit |
| 10. Cable route | Exit location, usable length, connector and strain relief | The approved installation can route the cable without interference |
| 11. Driver identity | Driver model, labels and supplied power accessories | Differences from the approved component list are reviewed |
| 12. Electrical suitability | Qualified review, model documents and destination configuration | Applicable product-level requirements are resolved |
| 13. Lit-face uniformity | Final print, viewing conditions and any agreed measurement grid | Dark bands, hotspots and corner shadows meet the agreed limits |
| 14. Illuminated color | Approved lit reference and print-material revision | The actual comparison meets the agreed color requirement |
| 15. Message and QR visibility | Viewing position, readable text and actual QR destination | Important content is visible and the code performs as intended |
| 16. Graphic replacement | Removal/refitting method and observations | The graphic can be changed as instructed without unacceptable damage |
| 17. Service access | Access route for the driver, lighting and connectors | The installed configuration permits the agreed servicing method |
| 18. Operating check | Agreed duration, conditions, start/restart behavior and observations | Faults are resolved and any required repeat check is recorded |
| 19. Surface condition | Front, edges, corners and rear photographs | Scratches, dirt, marks and gaps meet the agreed cosmetic criteria |
| 20. Protected packing | Face/corner protection, separated hardware and carton contents | The approved parts can be packed without rubbing or loose movement |
| 21. Shipment identification | Carton list, dimensions, gross weights and store/unit labels | The receiving team can match parts and graphics to the correct unit |
| 22. Approval and deviations | Open issues, corrections, substitutions and signed decision | The buyer has approved the final scope and remaining conditions |
For a rotating light box, add checks for the offered drive, moving clearance, cable arrangement and behavior under its approved load. For exposed installation, review the declared environment and exact enclosure evidence. Do not transfer an indoor static-frame approval to a different mechanism or outdoor configuration.
Identify the failed requirement before proposing a remedy. Retain the original photo or measurement, record the cause investigation, and repeat the affected check after correction. “We will improve it in production” leaves the buyer without an approved reference.
| Problem observed | Check next | Close the issue with |
|---|---|---|
| Frame size passes, but the graphic wrinkles | Compare the finished graphic, edge construction, template and instructed fitting method | A corrected graphic or fit, with fitted corner/front photos and the final template revision |
| A dark band appears with the production print | Verify the approved print material and fitting first; have qualified staff review the lighting configuration if the issue remains | A retest with the final print at the agreed viewing and measurement conditions |
| The batch uses a different driver from the sample | Compare ratings, dimensions, connections, relevant documents and service access; review the substitution before release | A written approved deviation or restored specified component, with any required recheck |
| The unit fits on a bench but not the shop fixture | Compare mounting holes, rear depth, cable exit and maintenance clearance against the real site | A revised installation drawing or approved pilot fit, not just a front-view photograph |
| A face is scratched after unpacking | Inspect rubbing points, loose hardware and face/corner protection; document where damage appeared | A revised packing arrangement and the agreed packing/receiving verification |
A sample approval defines the reference; it does not inspect the entire order. State the production lot, inspection selection, defect criteria, acceptance decision and records required for shipment release. Keep the approved sample or an adequately documented reference available for comparison.
Use three clear outcomes. Approved means the recorded configuration meets the agreed criteria. Correction required names the defect, responsible action and recheck needed before approval. Hold means an unresolved drawing, safety, fit or configuration issue prevents release. Agree who can authorize changes and which change needs a revised sample.
For repeat orders, compare the frame profile, graphic template, driver and mounting parts with the approved revision. Record substitutions before production. The same outside size does not prove that a new graphic or component will fit. Review replacement SEG graphic fit and reordering for the print-to-frame details.
At arrival, compare carton and unit labels with the packing list before mixing parts from different stores. Photograph transit damage and keep the affected packaging while the issue is reviewed. Check part count, graphic version and visible condition before installation.
Use the exact model’s assembly and mounting instructions. Qualified personnel should handle electrical connections and service requiring access to electrical parts. Keep drawings and part identifiers available for repairs. Follow the approved cleaning method for the actual graphic and enclosure; do not assume fabric is washable or a light box tolerates water cleaning.
The light box specification reference, quality-control page and packing and logistics page help frame the discussion. The project drawing, approval record and written order scope settle the actual requirements.
It can demonstrate some materials or finishes, but it does not automatically approve full-size illumination, rigidity, graphic tension or mounting. List what the sample covers and request the missing production-size evidence.
Use an illuminated fitted reference when the installed display will be lit. Keep its artwork, material and lighting configuration together so later prints can be compared on the same basis.
Check the identity and scope of the documentation. A component document is not automatically evidence for the finished configured product; have the responsible qualified reviewer confirm the destination requirements.
Dimensions and specified optical or operating values need defined limits and methods. Cosmetic fit and appearance can use an approved physical reference and written defect criteria. Neither should depend on an undefined phrase such as “high quality.”
Request the change description and compatibility evidence before release. Decide which checks need repeating, update the revision record and approve or reject the deviation in writing.
A short initial inquiry is enough. Tell us which light box you are considering and the issue you want the sample to resolve. Available drawings, artwork or installation photos can help; detailed dimensions, sample costs, MOQ, timing and inspection scope can be clarified during the quotation discussion.