Address
Caochang Industrial Area, Liguang Rd, Lishui, Nanhai, Foshan, Guangdong, China
Phone:
0086-20-8938 9313
0086-757-8938 9313
Email:
Work Hours
Monday to Friday: 8AM - 10PM
24x7 online service

Address
Caochang Industrial Area, Liguang Rd, Lishui, Nanhai, Foshan, Guangdong, China
Phone:
0086-20-8938 9313
0086-757-8938 9313
Email:
Work Hours
Monday to Friday: 8AM - 10PM
24x7 online service
Custom LED Light Box & SEG Display Manufacturer
 Byadminn
A replacement fabric graphic should be the inexpensive part of refreshing a retail campaign. But if the silicone edge is incompatible, the printed panel is too large or the illumination makes brand colors appear different, a simple reprint can delay installation. This guide addresses sourcing replacement SEG graphics for existing light boxes and repeat-order programs.
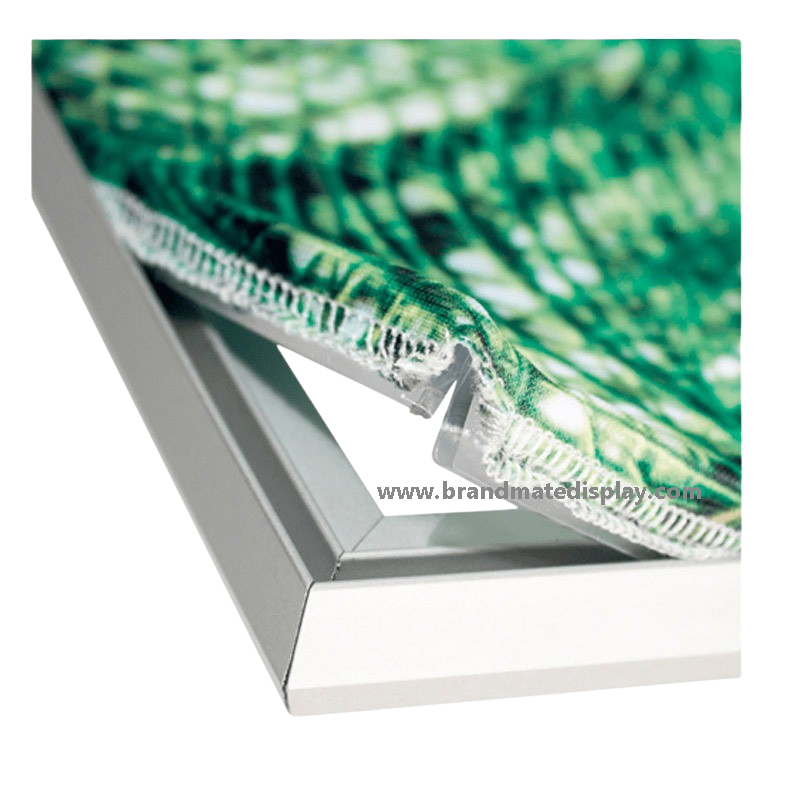
An SEG graphic is a printed textile face finished with a stitched silicone strip, designed to tension into a compatible perimeter frame channel. The light box hardware can often stay in place while campaigns change, provided the graphic fits the existing frame system.
Retail visual-merchandising teams, print houses, shopping-center fitters, display distributors, exhibition contractors and branding agencies routinely need reprints. The shared need is a repeatable template, reliable color and easy allocation by store.
A purchaser may only know that an installed display is ‘1000 by 2000 mm’. That label could refer to outer frame size, nominal opening or print size. Ask for the exact frame model and finished sewn graphic specification before preparing artwork.
Note outside frame dimensions, visible area, fabric cut/finished dimensions and silicone strip configuration. On double-sided units, note whether front and back prints have separate orientation or finishing requirements.
The strip’s dimensions, firmness, stitching position and insertion direction must work with the receiving frame. Systems from different suppliers are not universally interchangeable. Test a sample against the real channel before ordering a large campaign.
Select a fabric appropriate to the lighting arrangement, print method, opacity and desired illuminated look. A backdrop fabric designed for front lighting is not automatically suitable as a backlit light-box face.
Illumination can reveal uneven density, wrinkles, seams or undesirable transparency. Approve a small or full-size lit test using the current light box when brand appearance matters. Photograph under consistent conditions for repeat comparison.
Different textile and finishing processes can change the final dimensions. Agree on the supplier’s finished-size control and tolerances for the actual fabric. Quote the stitched final size, not merely the cut size before processing.
Maintain approved artwork, color references and a physically relevant print proof. A Pantone reference helps communication, but exact illuminated appearance requires a defined substrate, printing workflow and viewing conditions.
Ask for a manufacturer-provided template with seam allowance, safe area and visible crop. Keep master logos and graphics in suitable quality and record the version for every campaign. Never scale the old print by eye.
Print or pack identifiers indicating top/bottom, display model, side A/B, location code and revision where helpful. When a rollout contains many similar images, incorrect labeling can cost more than the printed item.
Switch off or isolate equipment as required, remove the old silicone edge carefully, confirm the new graphic ID, insert the specified corners/edges using the approved sequence and inspect tension. Follow the model-specific instructions rather than forcing a tight fabric.
Loose corners, diagonal pulling, puckered seams, visible edge escape and tension concentrated at one point warrant checking the template. Do not assume more force will correct a mismatched finishing dimension.
Keep replacement faces dry, clean and separated from abrasive frame parts. Use only cleaning methods compatible with the actual print/fabric. Store spare graphics in their labeled packaging and follow the supplier’s folding/rolling instructions.
A shopping-center campaign may change art four times per year while retaining the frame. Create a graphics schedule, centralized template archive and location-level inventory so each reorder uses the correct size and model revision.
Choose packaging that protects print quality and allows identification without unfolding every piece. For cross-border rollouts, confirm carton counts, labels, country allocation, customs descriptions and consolidated delivery plans.
Before distribution, inspect quantity, print content, orientation, surface condition, color against the agreed reference, silicone stitching, finished dimensions and sample frame fit. Record the specific defect and batch when rejecting a graphic.
Assign a SKU and revision code to each graphic. Store the approved art file, substrate specification, completed print dimensions, frame compatibility and production date. Trigger new approval if the supplier changes material or construction.
If the frame channel is damaged, even a correct graphic may fit poorly. Inspect the hardware before repeatedly ordering replacement prints. Where illumination has changed, compare the driver/LED assembly as well as the print.
| Field | Required buyer input |
|---|---|
| Current frame | Manufacturer/model and channel detail |
| Print dimensions | Visible area and finished sewn size |
| Silicone edge | Strip profile and sewing orientation |
| Artwork | Editable master, campaign version, language |
| Performance | Backlit fabric, approved color sample |
| Order | Quantity by location and delivery date |
Will any LED SEG graphic fit my existing frame? No. Confirm the silicone edge and finished sizing against that frame.
Can I replace only the graphic? Often yes if the frame remains serviceable and the new print is compatible.
Why does the new print look different under light? Fabric, ink, print process and lighting condition may differ; compare to a defined lit proof.
Send BrandMate Display a photo of the installed frame, model details, visible and finished print dimensions, silicone profile, artwork, quantity and destination. Ask for a compatibility check or sample before any large reprint. Begin with our LED SEG Light Box range and the manufacturer’s current specification drawing.
For a replacement graphic, email BrandMate Display with your existing frame reference, required graphic dimensions and clear photos of the edge and fixing channel. Confirm the template and finishing against that frame before approving printing.