Address
Caochang Industrial Area, Liguang Rd, Lishui, Nanhai, Foshan, Guangdong, China
Phone:
0086-20-8938 9313
0086-757-8938 9313
Email:
Work Hours
Monday to Friday: 8AM - 10PM
24x7 online service

Address
Caochang Industrial Area, Liguang Rd, Lishui, Nanhai, Foshan, Guangdong, China
Phone:
0086-20-8938 9313
0086-757-8938 9313
Email:
Work Hours
Monday to Friday: 8AM - 10PM
24x7 online service
Custom LED Light Box & SEG Display Manufacturer
A rotating printed light box works best when its support, movement and service access are planned together. Start with the location and the people who will use the space, then choose the mounting arrangement for the exact model. A floor base, wall bracket and overhead support are separate engineering decisions, not interchangeable accessories.
Quick answer: send a site photograph, a dimensioned location sketch and the proposed display size to BrandMate. Ask for a drawing showing the support, swept clearance, cable exit and access for graphic changes. Approve the complete configuration and installation responsibilities before releasing the order.
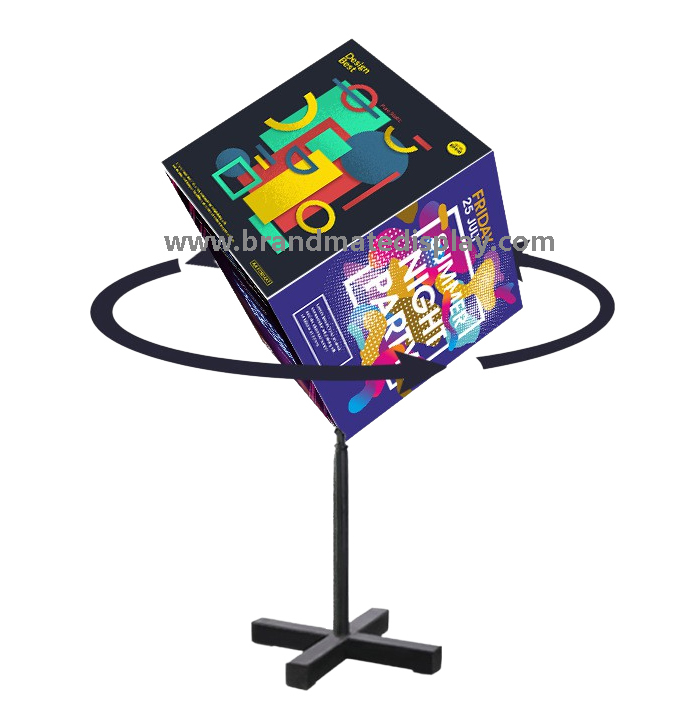
This guide helps retail buyers, shopfitters and exhibition contractors prepare a usable brief. The photograph alongside it shows a floor-standing printed cube. Wall and overhead arrangements below are project-review requirements; availability and suitability must be confirmed for the quoted model.
| Proposed location | Useful reason to consider it | Evidence needed before approval |
|---|---|---|
| Floor-standing | Place a printed promotion where visitors approach from several directions, with accessible graphics and service parts. | Actual base footprint, assembled weight, center-of-mass information where relevant, stability method, cable route and circulation plan. |
| Wall-mounted | Keep floor space available while presenting a sign from an agreed viewing position. | Identified wall construction, bracket and fixing drawing, complete supported load, stand-off and service clearance, reviewed by the installer. |
| Proposed overhead installation | Consider visibility above fixtures when a suitable engineered configuration and accessible service plan are available. | Structural support review, model-specific attachment details, loads, retention requirements, public separation and the venue’s installation approval. |
Keep indoor, sheltered and exposed locations distinct. Describe rain, cleaning spray, temperature and air movement where relevant. Any enclosure, corrosion or wind-performance requirement needs evidence for the actual complete assembly and installation, rather than a general outdoor label.
Show the finished display dimensions, support projection and swept envelope as separate items on the drawing. Include nearby shelves, glazing, pillars and customer routes. The space required to remove a graphic or reach a driver may be larger than the space occupied during normal operation.
For a multi-face printed sign, plan how long each message remains visible from the main approach. A price list needs enough reading time; a short campaign message can suit a different presentation. Confirm movement, speed or direction controls and daily operating requirements for the selected model. Video and electronic content scheduling require a separately specified digital display, not an ordinary printed light box.
| Drawing item | What to identify | Who checks it |
|---|---|---|
| Support and fixing | Base, bracket or proposed overhead attachment; substrate; complete installed load and fixing scope. | Model supplier and appropriately qualified site installer or structural reviewer. |
| Operating envelope | Moving faces, support projections, surrounding fixtures and required separation from people. | Designer and site operator, using the quoted configuration’s drawing. |
| Graphic change | Panel removal direction, tools, working position and space to handle a replacement print. | The team responsible for campaign changes. |
| Electrical service | Accessible isolation point, cable exit, driver location and the safe access required for inspection. | Qualified electrical installer or service technician. |
| Delivery access | Packed dimensions, doors, loading route, access equipment and unpacking area. | Receiving team and installation contractor. |
Share the floor surface, available footprint and likely contact from customers, trolleys or cleaning staff. Ask for the base and complete assembly to be identified in the quotation. A wider support can change storage, freight and circulation requirements, so agree it before artwork and packing are finalized.
Use the model’s instructed assembly and stability checks on the intended surface. Confirm that the feet sit properly, joints are secure and the cable route stays clear of public circulation. Record the assembled configuration and review any rocking or unintended movement before approving that installation. Do not improvise ballast or modify the base without a reviewed design.
For a wall proposal, provide the actual substrate and any restrictions on drilling or concealed services. Ask the installer to review the fixing arrangement, bracket projection and complete supported assembly. A photograph of a finished sign cannot determine suitable anchors, fastener torque or substrate capacity.
For a proposed overhead installation, agree who evaluates the structure and who supplies, installs and inspects the attachment system. Include the complete suspended load, permitted orientation and retention provisions in the review. Keep access to the sign, neighboring equipment and building services on the same installation drawing. This is a purchasing and coordination checklist, not a site-specific structural calculation or DIY suspension instruction.
Ask how a technician will isolate both lighting and movement, confirm isolation and reach the driver or drive mechanism. Electrical and fixed-installation work belongs with appropriately qualified personnel following the model instructions and applicable local procedures. Switching a light off is not proof that all electrical or mechanical energy has been isolated.
A useful service drawing identifies the opening direction, component access, lifting or removal needs and the replacement-part references. An accessible service position can make later maintenance more manageable; confirm the actual method on the sample instead of assuming that every graphic face or driver can be removed in place.
Confirm the frame, bracket and base materials; finish; graphic substrate and thickness; print attachment; lighting; driver; and movement components in the offered configuration. Use its production template for the visible area, cut size and any returns. For illuminated artwork, compare the fitted print in the intended lighting conditions and agree the color reference and acceptance method.
Before an order, assemble a representative sample using the offered support and graphics. Review visible appearance from the intended approach, repeat the instructed graphic-change process and record the access required. Request operating and stability evidence under agreed conditions; do not turn an informal demonstration into a certified test or a promised operating lifetime.
| Sample observation | Record to retain | Useful next action |
|---|---|---|
| Rubbing, uneven movement or unexpected noise | Model/revision, fitted load, operating conditions and a video showing the symptom. | Stop operation where unsafe; have the responsible technician review alignment and the specified assembly before a documented recheck. |
| Base rocks or support does not match the drawing | Surface, base and joint photographs; supplied support parts; drawing reference. | Resolve the support and site mismatch before accepting the installation. |
| Print is difficult to replace | Replacement sequence, opening direction, tools and clearance photographs. | Review the access plan or offered graphic system before approving repeated campaign use. |
| Cable conflicts with movement or circulation | Actual exit, routing, connector location and operating envelope. | Agree a model-appropriate route with the qualified installer and verify it on the assembled sample. |
| Packed hardware is incomplete or damages a face | Pack list, protected components, carton labels and receiving photographs. | Revise separation, identification or packing and repeat the receiving check before shipment approval. |
Prepare the site brief, confirm the offered model and mounting proposal, review the drawing and artwork, then approve the sample and inspection plan. Freeze the agreed revision before authorizing production. For each location, retain the approved drawing, component list, artwork reference, installation instructions and receiving record together.
Pack the actual installation kit: floor bases, wall brackets and reviewed suspension hardware need different lists and protection. Separate heavy supports from printed faces, identify fixings and cables, and obtain actual package dimensions and gross weight for freight planning. A site label and assembly reference help the receiving team match each kit to its installation.
Confirm sample cost, MOQ, production timing, warranty scope and spare-part availability in the project quotation. Keep artwork approval, dispatch, receiving and installation milestones separate. A documented plan helps the teams coordinate; it is not an unconditional delivery promise.
Use the instructed cleaning method for the face and finish. Have responsible personnel inspect supports, accessible fasteners, cable condition and movement according to the maintenance instructions. Isolate the equipment and follow the service process when damage or unsafe behavior appears; do not keep operating it to finish a promotion.
For reorders, send the approved model and drawing revision, graphic template, installation format and required quantity. Confirm compatibility if a face, driver, bracket or other component changes. The same artwork dimensions do not prove that two support systems are interchangeable.
Only after the model and complete mounting arrangement have been reviewed. Request the matching drawing, supported load, cable route and access requirements rather than repurposing the floor base or bracket.
Send location photographs, intended size, installation height, available structural information and the responsible installer. Obtain a model-specific proposal and independent site review before approving overhead use.
Record the complete sign, support footprint or projection, movement envelope, service space and packed dimensions. Each serves a different purchasing or installation decision.
Confirm the model’s graphic-change instructions, tools and accessible working position. Staff graphic replacement is separate from electrical servicing or structural installation.
Send BrandMate your actual finished size, installation location, quantity, graphics and operational requirements. Ask for the available configuration and the drawing, sample and commercial scope needed for your project.
Review the rotating LED signage product page, then email the actual site and customization requirements. Use quality control to discuss sample and inspection records, and packing and logistics to define the installation kit and receiving plan.
Discuss your mounting brief on WhatsApp or email BrandMate Display. A location photo and a simple sketch make the first discussion useful; detailed drawings can follow without adding compulsory fields to the inquiry form.
Send BrandMate the actual size, site photographs and mounting requirements. Confirm the model drawing and responsible installer before approval.