Address
Caochang Industrial Area, Liguang Rd, Lishui, Nanhai, Foshan, Guangdong, China
Phone:
0086-20-8938 9313
0086-757-8938 9313
Email:
Work Hours
Monday to Friday: 8AM - 10PM
24x7 online service

Address
Caochang Industrial Area, Liguang Rd, Lishui, Nanhai, Foshan, Guangdong, China
Phone:
0086-20-8938 9313
0086-757-8938 9313
Email:
Work Hours
Monday to Friday: 8AM - 10PM
24x7 online service
Custom LED Light Box & SEG Display Manufacturer
An LED magic mirror light box combines a reflective face with an illuminated advertising graphic. For a printed-graphic model, changing the light can change which image dominates; it is not the same purchase as a digital mirror that plays video. To choose the right unit, approve the exact display sequence in your venue’s lighting, then check the sensor behavior, fitted artwork, mounting and service access on the same sample.
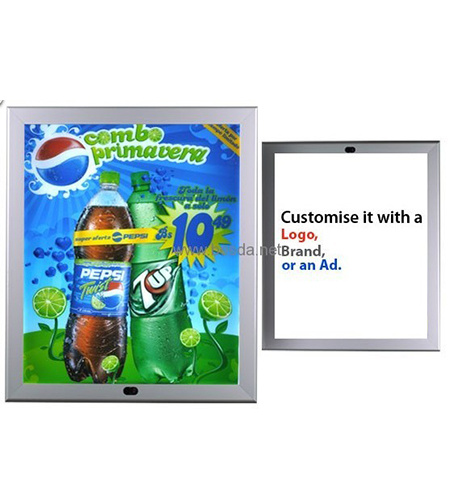
Discuss the offered configuration on the BrandMate LED magic mirror light box page. A sensor, adjustable delay, multiple-image mechanism or digital screen must be identified in the quotation; these features are not interchangeable.
Describe what a visitor should see in three states: nobody nearby, a visitor approaching or using the mirror, and the visitor leaving. Include what should happen when another person approaches before the first cycle finishes. This short description resolves a common misunderstanding: one buyer expects an advertisement to appear on approach, while another expects the advertisement to disappear so the visitor can use the mirror.
| Situation | Decide before quotation | Record on the sample |
|---|---|---|
| No visitor present | Advertisement, reflection or another specified resting state | What appears after startup and after the previous visitor leaves |
| Visitor approaches | Desired transition and where it should be triggered | Actual approach path, installed height and observed response |
| Visitor remains nearby | Hold the useful state or run an agreed sequence | Behavior while a person stands still or moves normally |
| Visitor leaves or another arrives | Return behavior and how a new trigger is handled | Observed delay and repeat-trigger behavior, not a claimed universal setting |
| Power is restored | Required default state and any retained settings | Restart result with the actual driver and controller supplied |
For a fitting-room entrance, a reflective state during use may matter more than attracting passing traffic. At a promotional counter, the advertisement may be the priority. Show the supplier your intended sequence rather than asking only for “a motion-sensor mirror.” If video, a playlist or remote content updating is essential, specify a suitable digital display separately.
The view through a reflective face is affected by the room, lighting behind the face, artwork and viewing position. A striking demonstration in a dark room does not establish the result beside a bright shop window. Evaluate the actual face and print at the proposed mounting height, with the lights and nearby surfaces that will be present.
Check the normal viewing distance and the approach from both sides. Look for glare from windows or spotlights, reflections that compete with the message, and small text that disappears through the face. Inspect the mirror-like state as well as the advertising state. Avoid approving one from a photograph of the other.
Record a continuous video of the transition and still photographs of both settled states. Keep the camera position, exposure and white balance consistent when comparing samples. Include the room conditions and artwork version in the record. If you cannot test at the site, reproduce the important lighting conditions and list what remains to be confirmed at installation.
If the graphic is hard to read, check the final print, viewing position and lighting conditions first. A different print or location may solve a contrast problem that a timer adjustment cannot. Do not change the driver or internal lighting without the responsible technician reviewing the configuration.
Use this sequence for a configuration that actually includes a sensor. Keep the unit safely mounted and follow its instructions; the test does not require opening powered equipment.
Set the acceptance criteria before the trial: required approach area, unacceptable false triggers, usable state while occupied and return behavior. A sensor’s quoted range alone does not describe this interaction. Mounting height, direction and controller behavior must be considered together.
| Observation | Check first | Approval evidence after correction |
|---|---|---|
| Passing traffic repeatedly switches the display | Detection direction, mounting position and any supported adjustment | A repeated walk-past test with the final mounting and settings |
| A visitor reaches the mirror before it changes | Actual approach path and coverage; confirm the desired transition with the controller specification | Marked response positions and a continuous approach video |
| The state changes while the visitor is still using it | Whether the system detects presence or movement, and how its timer/retrigger logic operates | An occupied-state test and a clearly documented accepted behavior |
| The state sequence is reversed | The approved resting/triggered brief and the supported controller settings | A corrected full cycle, including return and restart |
| The ad is visible but its message is difficult to read | Final artwork, fitted print, viewing angle and representative ambient lighting | A readable fitted proof under the approved conditions |
Use a drawing that identifies outside width, height and depth; visible graphic area; finished print dimensions; fixing positions; cable exit; and opening/service clearance. A nominal poster size does not provide all of these. For a custom installation, email the required sizes and a sketch to BrandMate before producing artwork.
Fit the production print behind the actual face. Inspect trimming, border overlap, image orientation and light leakage at edges. Judge color with the display illuminated and through the offered face, not only from an unlit paper proof. Keep the approved artwork, print material and finishing revision with the sample.
If more than one advertising image is requested, ask how each image is held, displayed and replaced. Confirm the full sequence on the quoted unit. A layout showing several pictures is not itself proof that one unit cycles between them.
Before approving a recessed or framed-in installation, test how the face opens and how the graphic can be removed. Leave the clearance the exact mechanism needs. Decorative trim should not trap a service panel or block the sensor. A frame that is easy to maintain on a workbench can become inaccessible after the shop fit-out.
Have the responsible installer confirm the actual wall or fixture, unit weight, fixing arrangement and cable route. The chosen anchors must suit the substrate and installation; a generic accessories photograph is not an anchor specification. Qualified personnel should review supply compatibility, electrical documentation and any work requiring access to electrical parts.
Identify the replaceable driver, sensor and control parts by the offered model and revision. Confirm the permitted cleaning method for the coated face and enclosure. Keep liquid away from electrical openings and do not use unapproved abrasives or chemicals. A reflective front is not evidence that the complete assembly is suitable for rain, wet cleaning or another exposed environment.
| Decision | Evidence to retain |
|---|---|
| Correct product and sequence | Model/revision, controller/sensor list and a video of every required state |
| Useful appearance | Final lit print, mirror-state images, viewing position and room-lighting record |
| Dimensions and artwork | Measured drawing, visible area, fitted print and approved template revision |
| Installation and service | Rear/mounting drawing, qualified review and demonstrated graphic/service access |
| Surface and packing | Front/corner condition, separated hardware, face protection and labeled package contents |
| Approval and later changes | Corrections closed, final settings and written handling of component or graphic substitutions |
For several stores, keep the unit, artwork and location IDs aligned on the packing list. Check the reflective face for damage before installation and document any transit damage with the packaging. A pilot provides an approved reference; agree bulk-inspection records and shipment release separately. Review the light box sample approval guide for dimensional records and correction closure.
No. A printed-graphic configuration needs a changed print for new artwork. Video and digital content management require a separately specified screen and control system.
Confirm the exact quotation and component list. Also confirm whether the desired delay and occupied-state behavior are supported; a sensor alone does not define the complete interaction.
Not automatically. Evaluate important differences in ambient lighting, mounting and visitor approach, then approve representative conditions for the rollout.
Demonstrate the offered opening method with the unit mounted as intended. Confirm tools, clearance and which operations require qualified service personnel.
The required outer or visible size, installation photo/sketch and desired display sequence are enough to start. The final drawing can resolve print dimensions, fixing and service space before sample approval.
Email BrandMate Display at [email protected] with your actual size, specification and switching requirements. Include a venue photo or short explanation of the visitor path if available. Ask for the offered configuration, artwork template and sample proposal; MOQ, costs and delivery timing can be confirmed for that project.
For a permanently visible printed display instead, compare the LED crystal display. The quality-control and packing and logistics pages provide related project questions. You can also use the contact page or the simple form below.