Address
Caochang Industrial Area, Liguang Rd, Lishui, Nanhai, Foshan, Guangdong, China
Phone:
0086-20-8938 9313
0086-757-8938 9313
Email:
Work Hours
Monday to Friday: 8AM - 10PM
24x7 online service

Address
Caochang Industrial Area, Liguang Rd, Lishui, Nanhai, Foshan, Guangdong, China
Phone:
0086-20-8938 9313
0086-757-8938 9313
Email:
Work Hours
Monday to Friday: 8AM - 10PM
24x7 online service
Custom LED Light Box & SEG Display Manufacturer
A practical durability plan helps keep LED light boxes ready for daily operation, campaign changes and transport. Before a bulk order, match the frame, graphic system, service access and packing to the way your team will use the display. This guide helps retail rollout teams, sign distributors and exhibition contractors approve printed light boxes, including rotating cube-format signs, with clear sample checks and maintenance records.
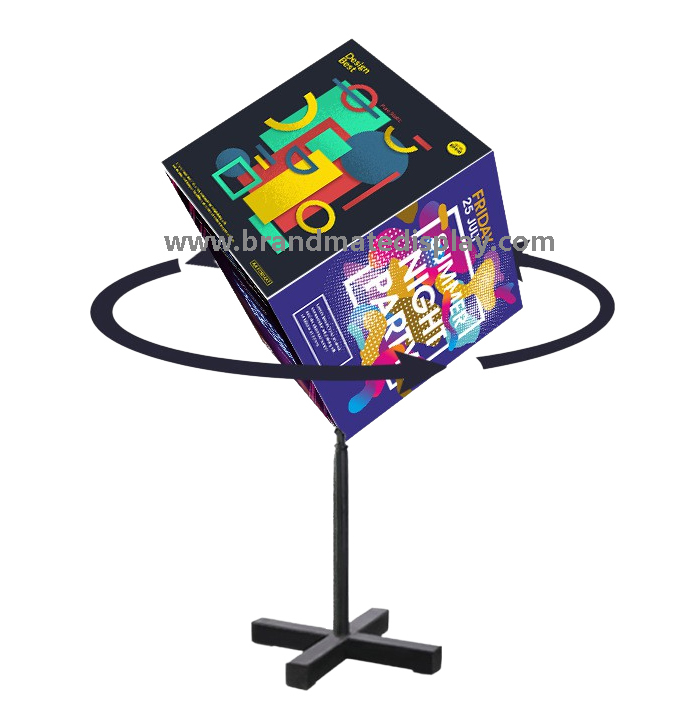
A fixed shop display, a restaurant entrance and a touring exhibition have different service needs. A retail team may change graphics every campaign; an event team may assemble and pack the same frame repeatedly; a rotating sign adds a drive mechanism and moving clearances. Share the installation location, daily operating schedule and travel frequency with BrandMate. For an exposed location, confirm the exact model and mounting arrangement against the site conditions before approval.
A rotating printed light box presents physical graphic faces from different viewing angles. Confirm the number of faces, movement and graphic-change method for the quoted configuration. Where video is part of the brief, specify a digital screen and control system separately.
| Part or condition | Ask the supplier to identify | Sample check and record |
|---|---|---|
| Frame and base | Material, profile section, joints, fasteners, base and mounting method | Assemble the specified configuration; record joint fit, play, sharp edges and stability on the intended surface |
| Graphic system | Print substrate, thickness or fabric weight, edge finish and fixing | Fit the approved artwork, then remove and refit it using the instructed method; photograph creases, edge damage and fit |
| Lighting and power | LED arrangement, driver model, input/output ratings, connector and service access | Record the agreed operating period and conditions; inspect visible light consistency and connections without dismantling live equipment |
| Rotation, if included | Drive assembly, load limits, speed, cable route, access and replaceable parts | Use a video with the installed graphic and intended load; record starting behavior, rubbing, wobble and noise conditions |
| Exposure | Declared indoor/outdoor use and applicable enclosure test documentation | Match the report to the model and assembled system, including connectors and cable entry |
| Transport and servicing | Pack method, protected corners, spare parts and written service terms | Unpack and reassemble the sample; record damage, missing parts and the access needed for a repair |
Agree the method, sample count and acceptance limits before testing. Record the model revision, sample ID, date, conditions, photographs and reviewer. Keep the completed sample record with the agreed production inspection plan so both teams know which checks to repeat on the ordered configuration.
Ingress protection describes the entry of solids and water into an enclosure. Review the model, test basis and complete covered configuration against your installation. Confirm corrosion protection, mounting stability and cleaning requirements separately, because these answer different service questions from an IP code.
Describe any condensation, cleaning spray or wind-driven rain at the site, including sheltered entrance locations. Ask BrandMate to confirm the documented exposure limits for the offered configuration; keep any open requirement on the approval sheet until it has a model-specific answer.
Material descriptions need to identify the actual parts. Request the frame section and finish, graphic material and edge construction, lighting and driver references, joint design and accessible service parts. For a fabric face, the textile and finishing must match the offered frame and approved print template.
Accessible, compatible replacement parts can make servicing more manageable. A reusable frame can support later campaigns when the approved replacement graphics fit the same edge system. Confirm the access method, spare-part reference and graphic template on the sample so those advantages remain practical during later maintenance.
Keep frame, graphic, electrical and mounting requirements separate on the project sheet, then review them together on the complete sample. For a custom size or service environment, email BrandMate Display with the actual dimensions, installation conditions and maintenance requirements so the quoted configuration can be checked against your use.
Let the intended maintenance team change a graphic, locate the permitted service access and identify the matching replacement parts. For a rotating sign, observe a complete movement cycle from the positions where staff and visitors will stand. If sound levels matter at the venue, agree the measurement method and conditions and retain the results with the approval record.
Save an approved reference sample or a documented acceptance record. When a fault occurs later, that record helps distinguish a wrong graphic, transit damage, assembly error and a component issue without guessing from a single photograph.
Identify whether the issue appeared at arrival, after installation, after a graphic change or during normal operation. Keep the order/model reference, affected quantity and the last approved configuration with the report. This separates a recurring wear problem from a wrong replacement graphic or an installation change.
| Observation | Evidence for review | Close the issue with |
|---|---|---|
| Graphic becomes loose after a campaign change | Existing frame revision, new graphic template/finishing and fitted edge photographs | A correctly matched graphic refitted by the instructed method, with the final template archived |
| A dark area appears after service or reassembly | Before/after lit photographs under comparable conditions; actual print and component references | Qualified diagnosis of any electrical issue and a repeated lit-face check on the corrected assembly |
| A rotating unit begins rubbing, wobbling or making abnormal noise | When the symptom occurs, installed configuration, load/graphic revision and safe observations | Stop use where safety is in doubt; have qualified service review the cause and record the approved operation recheck |
| A connector or joint is repeatedly damaged during events | Part ID, assembly sequence, photographs and the kit’s unpacking/repacking record | Correct parts and instructions, then repeat the agreed assembly/repacking cycles with the intended team |
| Scratches appear after transport | Condition before packing/after receiving, rubbing points, separated hardware and carton protection | A revised packing layout and receiving check; do not treat a cosmetic repair as correction of the packing cause |
Ask for the exact spare-part reference and compatibility instructions rather than a visually similar substitute. Record who approved a component change and which check must be repeated. Keep a service fault separate from a warranty decision until the order terms and cause have been reviewed.
A useful order sequence is: confirm the model drawing and bill of materials; approve the artwork and fitted sample; freeze the revision; agree in-process checks; inspect the finished configuration; verify packing and labels; then release shipment against the agreed records. Ask BrandMate which steps and evidence can be supplied for your project.
Write down quantities, customization, sample approval, replacement-part requirements and the inspection responsibility. Confirm MOQ, production timing and warranty scope in the quotation. Work backward from the installation date with separate sample-approval, production, inspection, transport and receiving milestones, then agree the dates for your project.
Follow the instructions for the exact model and mounting arrangement. Check the supplied parts and intended location before assembly. Have a qualified installer handle electrical connections and any fixed installation; disconnect power before the maintenance tasks allowed by the manual. Never adjust a live driver or moving drive mechanism.
For cleaning, use the approved method for the actual graphic and frame. Do not assume a printed textile is machine washable or that an enclosure tolerates pressure washing. Store the display dry, protect graphic faces from rubbing, and keep connectors and mounting parts identified. Record damage before the next installation.
Service life depends on the model, operating conditions and maintenance. Ask for the stated conditions, covered parts, warranty scope and replacement-part arrangements. Review the driver, graphic, frame and any rotation assembly together rather than using an LED component-life figure as the life of the whole display.
Send the actual site conditions and installation arrangement for review. Confirm that the offered model’s enclosure, electrical configuration and mounting documentation cover that location before approval.
Confirm the attachment, artwork template, edge construction and tolerance for that model. Test a replacement graphic on the approved sample; similar-looking frames may use incompatible fittings.
A rotating format introduces movement and associated drive and clearance requirements. A static format removes that mechanism. Choose based on viewing positions and the maintenance capacity of the site, rather than treating either one as universally more durable.
Send the order and model reference, affected quantity, installation photographs, operating conditions and a description of when the fault appeared. Stop using equipment that shows damage or unsafe behavior and follow the agreed service process.
LED cube display: review the cube format shown above, then confirm the actual drive, base and graphic arrangement. LED SEG light box: review the fabric-faced alternative when graphic replacement is a priority.
Use the quality-control page to discuss the evidence needed for your order and the packing and logistics page to define protection and receiving checks. These pages are starting points; the signed specification and actual inspection record determine what has been agreed.
Send BrandMate the display format, installed size, quantity, location photographs, daily operating schedule and graphic-change frequency. Request a proposal covering the construction, sample plan, service access and written commercial terms. An agreed configuration and clear maintenance references give your team a practical basis for approval and reorders.
Discuss the application on WhatsApp or email your specification. The contact form alongside this guide is available for an initial inquiry.