Address
Caochang Industrial Area, Liguang Rd, Lishui, Nanhai, Foshan, Guangdong, China
Phone:
0086-20-8938 9313
0086-757-8938 9313
Email:
Work Hours
Monday to Friday: 8AM - 10PM
24x7 online service

Address
Caochang Industrial Area, Liguang Rd, Lishui, Nanhai, Foshan, Guangdong, China
Phone:
0086-20-8938 9313
0086-757-8938 9313
Email:
Work Hours
Monday to Friday: 8AM - 10PM
24x7 online service
Custom LED Light Box & SEG Display Manufacturer
Build the store power plan from the exact light-box configurations, complete-unit input data and the local electrical professional’s site schedule. Reconcile connection, control, cable and service details before releasing each store kit.
This guide helps retail rollout buyers coordinate product information with the people responsible for the building installation. Its output is an agreed product-to-site interface record and handover plan. It does not provide a branch-circuit design, a universal number of signs per outlet or instructions for unqualified electrical work.

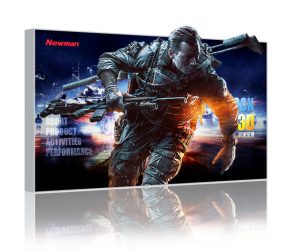
The photograph shows an illuminated printed display from the BrandMate LED SEG Light Box family. Ask for the electrical data and installation drawing for the exact offered assembly; the front image does not establish its input rating, wiring, driver arrangement or destination suitability.
List units by store and zone, keeping size, single- or double-sided configuration, quantity and controls distinct where they differ. Link each line to the proposed product/drawing reference. Do not average several cabinet variants into one assumed wattage or copy an electrical arrangement from a store with an unknown supply.
| Interface | Information to reconcile | Responsible confirmation | If it is unresolved |
|---|---|---|---|
| Unit and quantity | Store/zone ID, exact cabinet size/configuration, quantity, driver arrangement and drawing revision. | Buyer and BrandMate identify the offered assembly and kit scope. | Resolve missing or conflicting configuration references before freezing the store kit. |
| Product electrical data | Complete-unit input rating and units, supply range/frequency, supplied driver and relevant control/startup information. | BrandMate confirms available data for the offered assembly; the electrical reviewer checks its use in site design. | Do not substitute LED-strip output or an unrelated driver label for an unidentified complete-unit rating. |
| Site supply and connection | Actual destination/site supply, connection method, outlet/termination position, circuit reference and local review requirements. | Qualified local electrical professional and site owner. | Resolve the site interface and approved drawing before manufacturing a fixed cable or concealed access arrangement. |
| Control and service | Switch/control method, driver location, accessible isolation/service arrangement and physical cable route. | Manufacturer and installer reconcile product instructions with the actual fit-out. | Revise the interface or access design and repeat the relevant review; no assumed universal dimming compatibility. |
| Release and handover | Approved configuration/site schedule, installation wave, required documents and named release authority. | Buyer, site owner and responsible electrical contractor for their scopes. | Keep the affected store or kit on hold until its specific open items close. |
Assign who supplies product data, who surveys the site, who designs and accepts the electrical installation, and who releases the store kit. The buyer coordinates those records; BrandMate can confirm the offered product information, while the responsible local electrical professional determines suitability of the actual circuit and installation under the applicable requirements.
For the broader dimensions, graphics, packing and store-allocation scope, use the SEG retail rollout specification guide. Keep this power-interface record with that project package rather than expecting a general purchase quantity to specify every electrical connection.
Ask for the complete configured unit’s electrical input information, with voltage/frequency and the conditions or rating basis identified. Keep the cabinet, supplied driver and any included electrical accessories tied to that reference. If one external driver supplies several units or sections, identify the system boundary and connected arrangement so the schedule neither omits the supply nor counts it twice.
Separate the driver’s output rating, the LED component figure and the completed assembly’s mains input. They describe different boundaries. If only component data is available, ask BrandMate to resolve the assembled configuration and the information the site’s electrical reviewer needs; do not label an inferred number as the verified cabinet input.
A quantity multiplied by an applicable per-unit input value can produce a connected-product planning total for that identified group. Keep the value, units, quantity and assumptions visible. It is not permission to allocate the units to a circuit. The electrical professional must review the actual load characteristics, existing loads, control/startup behavior, protection, wiring and site requirements using the relevant product information.
Keep energy-cost estimates separate from circuit planning. If operating consumption matters, agree the operating/control state and what will be measured, then record hours of use and the tariff basis for the commercial estimate. A maximum or rated input multiplied by assumed hours is an estimate under those assumptions, not a measured operating bill, a guaranteed saving or an electrical installation approval.
Place the cabinet, connection point, driver location and cable route on the installation drawing. Identify the cable exit side, supplied usable lead length and the agreed connection or termination method. Reconcile these details with the actual joinery or wall opening before approving fixed fabrication. A correct front size does not settle whether the cable can reach the intended connection without interference.
Have the responsible installer confirm whether the arrangement is plug-connected, fixed-wired or uses a remotely located driver, and which party supplies each accessory. Do not assume a plug adapter, extension lead or visually similar connector is an accepted solution to a mismatch. Obtain the appropriate product and site review for any proposed change.
Separate routine graphic change from electrical servicing. Mark how staff change the print according to the product instructions, and how qualified personnel reach the driver or electrical connections for service. Request the actual model’s access, mounting, ventilation and operating requirements; retain them with the fit-out drawing. The photograph does not establish a universal clearance, enclosure rating or cooling arrangement.
If the proposed recess, shelf or finish obstructs required access or an instructed ventilation opening, revise the fit-out or offered configuration before release. Show the corrected route/access on the drawing and check it during the pilot. Do not conceal an unresolved interface behind finished joinery or improvise a wiring alteration to make a delivered unit fit.
Give the local electrical professional the complete product schedule and available electrical documents, together with the real site supply, intended operating arrangement and control requirements. That person should determine circuit allocation and any required protection, isolation, wiring and local approval. Do not derive a safe circuit count from illuminated area, a single product wattage or an unused socket visible in a site photograph.
If dimming, timers, sensors or centralized switching are required, identify the actual offered driver and compatible control arrangement before purchasing controls. Request the connection/control information and operating limits needed for the review. A dimmable LED component does not establish that a particular assembled driver/controller combination supports the proposed control.
Resolve document scope as well as the drawing. Have the responsible reviewer identify which product and installation evidence applies at the destination, then match supplied documents to the actual configured assembly and revision. A marking or report for one component is not automatically evidence for the entire sign or the customer’s building wiring. This guide makes no certification claim for the pictured product.
Electrical connection, testing requiring access to electrical parts, isolation and service belong to qualified personnel following the product instructions and site procedures. If a pilot shows a fault indication, damaged cable, abnormal operation or an unresolved safety concern, stop the affected use and have the responsible personnel make it safe and review it. Keep the item open until the prescribed correction and verification are complete.
Agree which store and configuration provide representative evidence, including the intended mounting, connection, graphic, driver location and controls. Record what the pilot covers and where other stores differ. A bench demonstration can verify a limited function, but it does not confirm access inside a store’s recess or the suitability of another location’s circuit.
Before the agreed functional trial, the responsible installers should complete the required installation and electrical review under their procedures. The buyer can then observe accessible functions and whether the final cable/access arrangement matches the agreed drawing, without opening electrical enclosures or handling energized connections. Retain the relevant qualified commissioning record and identify who accepted each scope.
| Pilot check | Evidence to retain | Correction and repeat check |
|---|---|---|
| Identity and ratings | Unit/driver labels, drawing revision, accessory list and complete-unit input data used in the schedule. | Resolve a substituted or mismatched part; repeat compatibility and any affected functional checks. |
| Physical fit and access | Rear/side installation views, cable exit/route, driver position and access against the approved drawing. | Revise the drawing or fitting arrangement; verify the corrected route and service access before concealing work. |
| Site electrical acceptance | Qualified contractor’s site review and required commissioning records for the actual installed configuration. | Keep the affected installation unreleased until the responsible professional closes the issue under local procedures. |
| Switching/control behavior | Actual intended switch/control, operating states, supplied instructions and observations from the agreed trial. | Have qualified personnel review a malfunction or incompatible control; repeat the relevant trial after an approved change. |
| Store-kit identification | Store/zone, cabinet/driver/accessory labels, packing list and receiving/installation contacts. | Correct mixed or ambiguous parts before dispatch or installation; reconcile the final kit list. |
| Approved release | Closed deviations, final revisions, scope covered by the pilot and sign-offs for the next installation wave. | Identify stores or variants outside the pilot scope and obtain their missing evidence before release. |
Record the initial issue, responsible action, changed drawing/component and the repeat check that closes it. A corrected cable exit can require a physical-fit recheck; a changed driver or control can require technical compatibility and functional review. Do not close several different failures with a generic “approved” note. Update the affected store schedule when the final interface changes.
Align cabinet, driver, accessories and cartons with the approved store/zone and product revision. Keep the packing list, installation drawing, electrical data and supplied instructions together. Identify whether a driver belongs to one cabinet, several sections or a separately packed kit; a receiving crew should not have to infer the relationship from connector shape.
Before each shipment or installation wave, reconcile the quantities and unresolved exceptions by store. Release only the scope the named owners have accepted, and separate any variant still awaiting product data, site review or pilot evidence. An accepted pilot does not inspect every production unit or approve an unreviewed branch installation. Agree the production and receiving checks for the actual order.
After a substitution, compare the new part’s role with the accepted assembly rather than ordering from the visible connector alone. Ask for manufacturer/qualified technical review of electrical, control, physical and service compatibility, and repeat the affected checks. Record the approved replacement reference and keep obsolete drawings from being issued to another store.
At handover, identify the site contact, service responsibility, final drawing, isolation/control information supplied by the responsible contractor, part references and replacement-request route. Keep the stated operating and care instructions with the unit. Confirm the project-specific sample scope, documentation, spare availability, price, quantity, delivery phases and timing directly with BrandMate and the site team.
Share the store/zone count, required cabinet variants and quantities, destination, actual supply information available from the site team, preferred connection and cable exit, driver/service location and planned switch/control method. Add installation photographs or drawings and the intended release waves. Ask BrandMate which product data and configuration documents are available for your local electrical professional to review.
Use identified complete-unit input data for each offered configuration. Area alone does not identify the light engine, driver or connected arrangement, and it cannot determine site circuit allocation.
No. Keep the pilot’s actual scope and review each site’s supply, installation and differences with the responsible electrical professional. Transfer only the evidence that applies to the same accepted interface.
Have the proposed replacement reviewed against the complete approved assembly, including electrical, control, physical and service requirements. Record the accepted part and repeat the affected checks before release.
Explore the BrandMate LED SEG Light Box family and discuss the configuration and documents needed for your site review.
Tell BrandMate which light boxes and stores are involved. Detailed site schedules and electrical requirements can follow the first inquiry with your responsible installation team.