Address
Caochang Industrial Area, Liguang Rd, Lishui, Nanhai, Foshan, Guangdong, China
Phone:
0086-20-8938 9313
0086-757-8938 9313
Email:
Work Hours
Monday to Friday: 8AM - 10PM
24x7 online service

Address
Caochang Industrial Area, Liguang Rd, Lishui, Nanhai, Foshan, Guangdong, China
Phone:
0086-20-8938 9313
0086-757-8938 9313
Email:
Work Hours
Monday to Friday: 8AM - 10PM
24x7 online service
Custom LED Light Box & SEG Display Manufacturer
Approve measured assembled width, depth and visible print area rather than ordering by the nominal backdrop width; verify the floor-plan fit before committing the artwork.
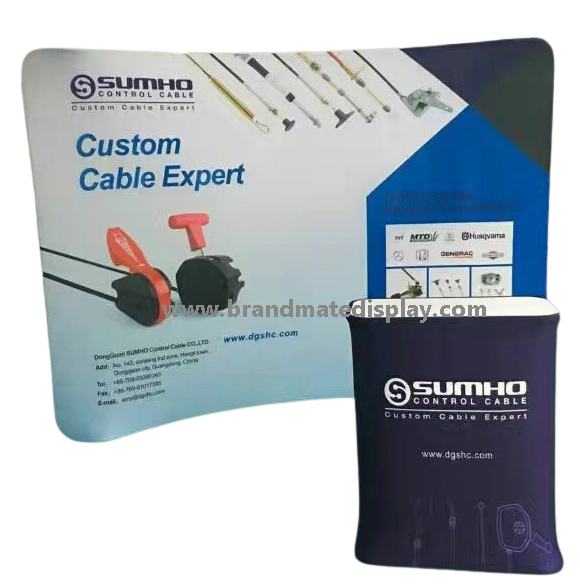
A label such as 10-foot backdrop often describes the marketing class rather than the precise outer dimension. Insist on a drawing with overall width, height, depth and support-foot projection before committing space on a venue plan.
Count base plates, stabilizer feet, rear braces and adjacent cabinets. What occupies a 3-meter wide graphic may need extra space at the rear; organizers may prohibit protruding hardware into an aisle.
Stand assembly can require tilting a frame upright. Confirm available ceiling height, hanging fixtures and the clearance needed for two installers to handle large fabric panels without dragging the print.
Zippers, pole pockets, frame returns and wrapped edges can hide artwork. Place logos and compliance text inside a supplier-approved safe zone rather than flush against the file artboard.
A curved structure changes the distance between its ends and may pull printed graphics away from nearby booth walls. Compare the projected plan view, not the arc length printed on the fabric.
In an interview or sponsor photo zone, test background coverage with a person standing away from the wall. A graphic that fills a product mockup may not cover a wide camera shot.
Map the distance and angle from which attendees approach. A side return can increase visibility from a cross aisle, whereas a deep curved wall may hide a corner message when viewed obliquely.
Segmented tubes, foldable lattice frames and silicone-edge tracks need different technical templates. An image labeled backdrop cannot establish its connectors or its actual assembly geometry.
Ask for a simple diagram showing backdrop, counter, entry, electrical outlet and storage. It identifies conflicts early and makes the quotation more useful than a dimensionless 3D rendering.
Artwork preview files can scale without respecting fabric stretch, cut allowances or assembled seam locations. Request the final production template for the exact hardware revision.
For clients alternating between small and large events, check whether a compatible extension is available. Confirm that the frame connectors and graphic template support the extension before planning a modular upgrade.
If visitors can walk behind the structure, confirm backside appearance and whether a second print is supported. A freestanding base may require a different orientation or stabilizer than a wall-back configuration.
If one continuous graphic exceeds material width or shipping limits, agree where joins will appear and prevent critical marks crossing them. Approve the lit or unlit final proof appropriate to the chosen product.
Ask whether ladders, power tools or additional labor are required. Even a portable kit may need two people at a tall venue, so installation claims should reference the exact model and trained crew.
A backdrop within venue limits can still include one long rigid tube that is awkward for parcel shipping. Collect the maximum package length and how the crate will reach the event loading dock.
Exhibition agencies and distributors placing repeat booth orders should clarify the purchase scenario: buyers planning custom booth footprints. The commercial buyer approves the artwork/quantity, and the site specialist approves installation conditions. Use the selected BrandMateDisplay configuration and approved drawing revision for each sign-off.
Overlay the complete assembled footprint, including feet and rear braces, on the booth plan. Mark neighboring furniture and required access routes separately, then confirm that the whole footprint stays within the allocated space. Retain the marked drawing with the approved visible graphic width.
For a BrandMateDisplay quotation review, provide a scaled stand drawing, artwork safe-area template and photos of the intended location. Request a marked-up drawing showing feet and rear braces, with any assumptions clearly identified before price comparison.
Request with the RFQ: Provide the actual venue floor plan, a frame drawing with base/brace projections and the graphic safe-area template for the chosen frame revision.
Approve a plan-view drawing and one proof print showing logo positions before production. Include the floor-line reference and upper sightline; a digitally correct graphic can still be cropped when the assembled frame occupies the real stand.
Sample approval: Assemble the representative frame, check its outer footprint against the booth boundaries and inspect one printed proof for logo clipping at returns and seams.
Record packing length, assembly order and crew accessibility alongside the approved display width. Reorders should retain a dated dimension sheet so alternate installers do not mistake the printed graphic width for the assembled frame footprint.
Separate frame sections, stabilizer feet and printed graphics in the shipping plan. Include the installed footprint drawing and a labeled graphic template so the next event team can rebuild the same visible area without guessing.
A wide print with an underspecified rear clearance can breach venue boundaries. Resolve the conflict by comparing the frame base, stabilizer projection, adjacent traffic route and actual camera crop in one scaled approval sheet.
Before ordering a trade show backdrop, obtain a dimensioned assembled drawing showing the outer frame, visible print and stabilizer-foot projection as separate measurements. Overlay that drawing on the venue’s allocated floor plan and require written approval of aisle clearances; the nominal product name is not an installation dimension.
Send booth dimensions, intended backdrop height, venue limits, frame type, visible artwork area, print quantity, destination and install date. Ask BrandMateDisplay which fit checks and graphic proofs are available for your selected configuration.
Which drawing prevents a booth-space mistake? Ask for overall W×H×D, foot projection and visible graphic area on one signed drawing. Can we reuse artwork from another frame? Only after the supplier confirms the exact print template, attachment system and frame revision. Related product and factory references: Backdrop Display product family.
Related manufacturer resources: Backdrop Display · Quality Control · Warehouse & Logistics.
| Buyer verification | Evidence to request | Hold / recheck trigger |
|---|---|---|
| Installed width × height × depth | Dimensioned drawing of assembled frame, braces and projecting feet | Nominal “10 ft” or “3 m” label without measured outer dimensions |
| Graphic visible area and safety margin | Supplier-specific print template marking trim, wrap, seams and logo-safe region | Artwork approved only from an unscaled visual mock-up |
| Booth footprint and approach paths | Floor plan overlay with counters, access route and required rear clearance | Frame or stabilizers cross the booked booth boundary |
| Installation clearance | Assembly sequence, lifting envelope and venue height restrictions | Installed height fits but the frame cannot be safely raised |
| Packed size and repeat transport | Case longest dimension, package count and labeled frame parts | Packed kit cannot pass delivery doors or carrier limits |
| Photo-zone framing | Sample composition photographed at expected camera distance and angle | Sponsor logos crop out behind standing subjects |
Approval note: Ask the supplier to sign off one revision-controlled drawing and artwork template before releasing the bulk print. All dimensions and tolerances must be provided for the actual quoted frame.
Tell BrandMate about the display and where it will be used. Share drawings and detailed specifications during the project discussion.