Address
Caochang Industrial Area, Liguang Rd, Lishui, Nanhai, Foshan, Guangdong, China
Phone:
0086-20-8938 9313
0086-757-8938 9313
Email:
Work Hours
Monday to Friday: 8AM - 10PM
24x7 online service

Address
Caochang Industrial Area, Liguang Rd, Lishui, Nanhai, Foshan, Guangdong, China
Phone:
0086-20-8938 9313
0086-757-8938 9313
Email:
Work Hours
Monday to Friday: 8AM - 10PM
24x7 online service
Custom LED Light Box & SEG Display Manufacturer
Match a replacement magnetic light-box face to the existing cabinet revision and specified front assembly, then approve a fit sample on that exact pairing. Keep the retention interface, layer stack and visible opening with the accepted part record.
This guide helps retail maintenance buyers and display distributors replenish front faces or covers for existing cabinets. It concerns replacement-part compatibility after the light-box family has been chosen. A new print, a protective sheet and a complete front assembly can be different order items; identify which one is needed before asking for a replacement.

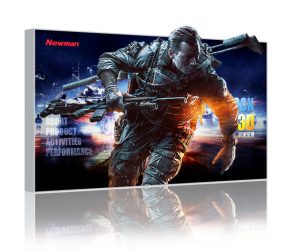
The image shows a framed illuminated graphic from the BrandMate LED Magnetic Light Box family. Its closed front does not show the retention mechanism, material stack or removal procedure. Use the identified cabinet and part drawing to resolve those details.
Record the cabinet label, original order or model reference, drawing revision and installation orientation where available. Photograph the complete installed front and accessible corners/edges, identifying which unit each image describes. Ask BrandMate what records are needed to identify a proposed matching part; a product-family name or nominal poster format is not a replacement specification.
| Item or boundary | Confirm for the actual cabinet | Evidence needed before acceptance |
|---|---|---|
| Existing cabinet | Model/order reference, generation/revision, orientation and original installed front assembly. | Cabinet/part records, accessible labels and identified front/edge photographs; list unresolved variants separately. |
| Replacement face or cover | Whether the offer is a complete front assembly, one protective layer or another specified part. | Replacement part/revision and a drawing that defines the supplied scope and included fittings. |
| Printed insert and other layers | Separate graphic size/material/thickness, visible opening and any specified protective or optical layer. | Model-specific layer diagram/template; do not transfer an insert size to the complete face drawing. |
| Retention interface | Location, orientation and construction of the specified mating points or retaining features. | Labeled manufacturer diagram or suitable close-ups and the permitted fit/acceptance method; no assumed universal magnetic arrangement. |
For several store generations, make separate compatibility lines. Keep an unknown unit unresolved rather than assigning it to the nearest-looking cabinet. A successful fit on one variant can be useful evidence for that pairing, but does not establish that another generation has the same corners, panel thickness or retention layout.
State the reason for replacement: surface damage, a missing face, a print change or another observed condition. Identify whether the original cabinet or interface also appears damaged. A new cover cannot establish that an unexamined cabinet is serviceable. Refer an uncertain cabinet or unsafe access condition to the responsible installer before treating its existing geometry as a usable reference.
Request the offered replacement drawing with outside face dimensions, corner/edge geometry, visible aperture and specified material/thickness. The print insert dimensions and any covered border need their own template. A nominal poster size can describe the campaign medium while leaving the complete face geometry undefined.
Use the maker’s stated measurement method, reference points, units and agreed tolerances. Compare accessible dimensions with the original record where a safe check is available. If the face is difficult to reach or the measurement method is unknown, obtain qualified assistance or the original drawing rather than dismantling the installation to guess a hidden detail.
Check the complete perimeter, including corners and any orientation-specific feature, against the proposed drawing. A matching width and height do not establish a matching profile or interface. Ask for clarification of an unexplained difference before sampling, and keep the original and proposed part revisions together in the request.
Do not turn a damaged, warped or previously altered panel into the cutting master without the responsible review. Record its condition and any mismatch separately. Where the original specification is unavailable, ask what inspection/sample route can identify a suitable replacement; this article does not promise that an undocumented cabinet can always be matched.
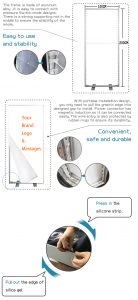
Request a labeled diagram or suitable close-ups of the specified mating locations, orientation and retaining features. Magnetic points, edge strips and other retainers depend on the actual construction; the closed product photograph does not identify them. Confirm the offered face and cabinet references on that interface record.
Ask whether the replacement includes the whole front assembly or only one layer. Identify the intended printed insert, protective sheet and other specified layers where the model uses them, with their approved material and thickness. A replacement face trial should use the accepted stack; a neat fit with the poster removed may not establish correct closure with the real print installed.
Have the manufacturer or responsible technical reviewer define the permitted seating/retention check for the actual arrangement and installation. A front photograph can document alignment but cannot establish every retention or safety requirement. This guide supplies no magnetic force value, pull-test procedure, mounting load or universal fit tolerance.
If parts do not mate as specified, request a correctly matched part or a reviewed revision. Do not add stronger magnets, improvise adhesive, drill a cover, bend a retainer or change the layer thickness to compensate for an unidentified mismatch. Keep an altered prototype separate from the approved order until the responsible review and affected checks are complete.
Agree the sample, scope and access method before handling the face. Have a trained person follow the model’s removal/refitting instructions and required power state, with suitable support for the removed front. Keep graphic access separate from electrical enclosures; electrical isolation or service work belongs to qualified personnel under the applicable instructions and site procedures.
Record the cabinet and sample part identities before the trial. Inspect accessible surfaces and retainers for damage, retain a photograph of the starting condition and place removed parts on a clean suitable surface. Do not continue an unfamiliar removal method by applying greater force; ask for the actual instructions or responsible assistance.
Fit the proposed face with the accepted poster/layer stack as instructed. Inspect each edge and corner from front and side for raised areas, unexpected gaps, movement, trapped media or misalignment. Compare the visible aperture and orientation with the approved template. Complete the manufacturer-agreed seating/retention check rather than treating visual flushness alone as the whole acceptance test.
Check permitted removal/refitting and installed access if those are part of the intended maintenance task. Agree the representative trial conditions and record the operator, instructions, part revisions and observations. Do not turn one successful exchange into a universal change time, cycle-life or safety performance claim.
Keep the failed sample identified and out of deployment. Photograph the exact edge, corner or mating point, the installed orientation and the material stack used. State whether the issue is an unexplained gap, a panel that will not seat, unexpected movement, trapped media, concealed content or an access problem. These observations guide the investigation; they do not prove the root cause.
Compare the actual cabinet/sample revisions with the offered drawing first. A wrong-generation part requires an identity correction; a different insert thickness requires a stack review; a damaged mating feature requires a cabinet/interface assessment. Ask BrandMate and the responsible technical party to identify the corrective scope instead of making several unrecorded adjustments to the sample.
| Checkpoint | Retain in the compatibility line | Correction and repeat trigger |
|---|---|---|
| Identity and scope | Cabinet model/revision, proposed replacement part/revision, supplied assembly/layers and drawing. | Resolve a different generation or incomplete scope before ordering the sample. |
| Geometry | Face outside dimensions, corner/edge details, visible aperture and accepted material/thickness from the drawing. | Request a correctly specified part if the sample geometry differs; do not cut or drill the delivered cover to fit. |
| Retention and seating | Labeled interface drawing, front/side/corner photographs and the maker’s agreed fit/retention acceptance record. | Refer a gap, raised edge, movement or incompatible interface for correction; repeat the approved checks on the exact variant. |
| Insert and visible crop | Actual poster/material stack, template/artwork revision and fitted closed-front view. | Correct the identified sheet/stack/template mismatch and repeat the full assembled check. |
| Permitted access | Instruction reference, installed access conditions, trained operator and agreed removal/refitting observations. | Resolve access or handling incompatibility with the responsible installer/manufacturer; do not increase force or alter retainers. |
| Release and replenishment | Accepted sample, closed corrections, approver/date, variant quantities and replacement-kit labels. | Repeat relevant fit/retention/access checks after a cabinet, face, material/thickness, mating layout or layer change. |
After correction, repeat the affected seating, retention, crop and permitted-access checks using the exact accepted stack. Retain the rejected and corrected part references, drawings, photographs and decision. Keep the compatibility line on hold until the responsible approver closes its specific conditions. A written promise to improve future parts does not supply a matched reference for the current cabinet.
Label each replenishment request and carton with the cabinet-to-face pairing, part revision, orientation where applicable and the store/variant allocation. Keep quantities separate across generations. At receiving, reconcile those identifiers and supplied layers/accessories before distributing parts; similar outside dimensions are not a reason to mix the stock.
Agree protection for the actual face material and finish, including separation from hardware that could rub or strike it. Retain the relevant handling and cleaning instructions. Do not infer that the face is acrylic, washable or compatible with a chemical cleaner solely from its appearance. Photograph damage and the affected packaging before the receiving issue is reviewed.
Trigger renewed review after a changed cabinet revision, face material/thickness, corner/profile detail, mating layout or insert/layer stack. Ask which fit/retention/access checks need repeating and update the compatibility register with the accepted replacement. An initial approved sample is a reference for that pair, not an inspection of every supplied panel.
Confirm whether the exact face, lens or other requested part can be supplied separately and what the quotation includes. Ask about the sample route, stock/production availability, packing, price, quantity and timing for the identified cabinet. No spare stock, universal interchangeability or supplier matching capability is established by this guide.
Send accessible cabinet identifiers, original order/drawing references, installed front/edge photographs, the part you need replaced, intended insert/layer details and quantities by variant. Add the installation/access conditions and destination. Request the proposed replacement-part specification and a fit-sample approval route before replenishing several stores.
Use the cabinet revision, complete face/interface drawing and accepted layer stack. Poster size alone does not establish the replacement panel or its retention geometry.
Keep it out of deployment, record the mismatch and ask for the matched corrective part or reviewed revision. Repeat the affected checks rather than forcing or modifying the interface.
It approves the identified pairing and conditions recorded. Establish which store variants share that accepted interface and obtain evidence for the others before allocating replacements.
Explore the BrandMate LED Magnetic Light Box family and discuss the actual cabinet and required part.
Tell BrandMate which cabinet you have and which front part needs replacing. Detailed drawings and photographs can follow the first inquiry.